This article is based on the April 2023 workshop by Christine Wright.
What is a “Professional Display” and WHY do we care about that?
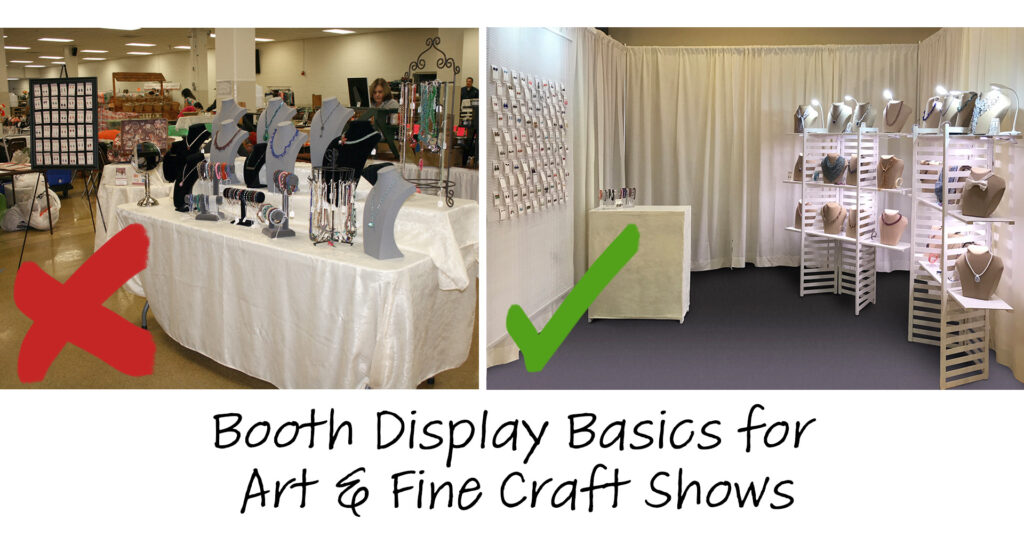
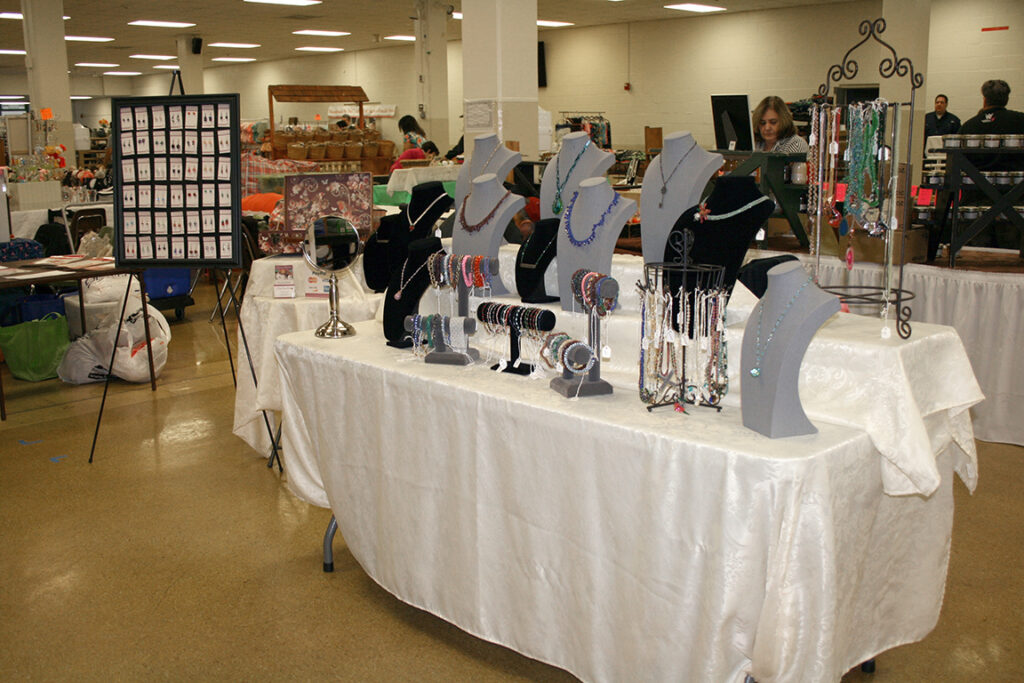
For all Haverford Guild of Craftsmen shows we require that all displays be professional. Our reason for this are that it sets an expectation of quality for shoppers who come in to our shows. This benefits our artists who typically have higher price points than those found at shows that are not strictly juried. For all booth sizes, there are some baselines when it comes to having a “professional display.”
- For all tables/counters you will need some sort of covering or tablecloth on all publicly viewable sides.
- The exception to this is if you have a table that is designed to be bare or see-through. When you have this sort of display, then figuring out where to stash your extra stuff becomes especially important because there should be absolutely nothing underneath those displays.
- All boxes, bags, purses, lunch bags and display luggage needs to remain hidden throughout the show. (This is where those tablecloths can come in really handy.)
- You need to keep yourself and your display contained to your space.
- Displays are neat and well-organized. It should not look like something you would see at a garage sale or flea market.
Sourcing Displays
Unfortunately there isn’t a great, “Artist Booth Display” store and it often takes almost as much creativity to craft your booth as it does to craft your craft! However, there are a few different ways to source stuff for your set up.
Shop Online
Never underestimate the power of Google! Figuring out the best price points, logistics, reviews and options almost always require a Google search. Just keep in mind when you are searching to read and review the sites carefully. Where is the company shipping from? Is the site reputable?
Likewise, when reading reviews for anything that you are shopping for, pay attention to the percentage of bad vs. good reviews and how many reviews are actually there? Read the bad reviews to see if people have the same complaints – and are those complaints something that happened because the user either didn’t read the instructions or had unreasonable expectations.
Don’t forget to take shipping into account! Unless you are shopping super-early (months early) for a show, keep in mind that shipping times can vary and often are super slow! Always check for estimated dates of arrival, and assume it’s going to take a day or two longer than that.
DYI
DYI’ing your booth is not necessarily a bad idea. But it can also be a terrible idea if you don’t have the skills to back it up. So be realistic about your skill level. Also … run the numbers first. If budget is a concern, sometimes DYI can be more expensive than just purchasing.
Upcycling/Repurposing
Personal note from Christine… I will be the last person to tell you to not repurpose items for display. However, just grabbing something and calling it a display can cause a whole lot more trouble than it’s worth. Repurposing should be done mindfully – and may require a bit of elbow grease to get them to the standard that they need to be to meet the “Professional” requirement.
The last thing you will want to have happen is to have that cool eclectic look turn into a garage sale from the Mad Hatter in Wonderland – which can very easily happen when the repurpose/upcycle approach goes too far. At the same time, if you repurpose/upcycle because of budget, just like for DYI it can get way more expensive than it’s worth. So bear these things in mind:
Handy Links and Resources:
Amazon.com (Prime memberships will save you a ton on shipping!)
Displays2Go.com (This is typically more for corporate tradeshows, but they still have some useful stuff for artists here.
DickBlick.com (Normally this is the go-to site for supplies, but they also have an Art Fair category to shop from.)
OnlineEEI (This is a go-to site for backdrops, booth walls and drapes)
HGC Art Show Application FAQ:
https://haverfordguild.org/artist-show-application-faq/
HGC Artist Resources & FAQs:
https://haverfordguild.org/artist-resources-faqs/
Pipe & Drape Supplier (for entire pipe & drape setups or just drapes):
https://www.onlineeei.com/shop_drapes.cfm
https://www.onlineeei.com/portable_backdrop_kit.cfm
ProPanel Displays:
https://www.propanels.com/
Artist Garage Sale Group (Facebook):
https://www.facebook.com/groups/304583956319136
All displays should melt into the background as much as possible and not be a feature of your booth or distract from or overwhelm your work. This is a sound rule of thumb for all booth displays whether you are upcycling or not. But professionally built displays already have that in mind. That’s why the majority of the time you can only buy them in neutral colors. Purple may be your signature color, but you really don’t want every display to be purple and overwhelm the work it is supposed to highlight. Avoid choosing something to act as a display that could also be considered a decoration or a feature.
Displays should be in good shape and sturdy as possible. Sure, you might really go for vintage and that old barn wood may be great for your aesthetic. But is it falling apart? If so, then don’t use it as as shelf! When you repurpose or upcycle, make sure that whatever you are using is in good working order or reinforced so that it won’t fall apart on you! Also, keep in mind your DYI skill level – are you capable of getting that lovely vintage thing ready for action in your booth?
A note about color… Color is fine in your booth! But avoid anything that screams circus! For example, if your work is colorful, go for neutral colored displays and walls. But if your work is neutral (like silver jewelry) then strong pops of color on your walls and displays will work just fine. Just don’t over-do it!
Remember that your work will need to shine the brightest and “pop” the most!
All of your displays should be cohesive – including the ones you repurpose. For displays, furniture, booth walls – it all needs to work together so that it does not distract from your artwork. When your repurpose something, it should look like it belongs with everything else in your display.
Run your numbers! The time, energy, cost of supplies can end up costing way more than simply purchasing a display for the same purpose. Repurposing can be very budget-friendly, but it can also backfire in a big way.
Stay Flexible!
It happens… Something breaks, your space was not as advertised. There’s a park bench or a tree in the middle of your space, you forgot something major – like a chair.
Shows are stressful all on their own, but if you go into one knowing that you’ve got a plan B, C, D, E and F, it get’s less stressful. So as you prepare, remember that flexibility is your friend.
How?
- Positive attitude! Knowing that stuff happens and laughing off issues like that fire hydrant inside of your booth space makes a much better impression on customers and show directors! (Bonus points if you figure out how to incorporate the fire hydrant!)
- As you collect displays, ask yourself if that display can be modular – especially if you do a number of shows in different locations.
Planning Ahead
Always plan ahead – and plan for different spaces and scenarios. There are a couple of different methods for Pre-planning:
- Grid Paper
- Computer Drawing
- Create a scale model
Figuring things out in a smaller scale is also friendlier to the budget than finding out that something won’t fit after you’ve bought it!
Dress Rehearsal
Yes! Practice! Do this! Set up your booth at least once before your show season begins:
- It will let you know what you will need to pack.
- Anything you have to grab like scissors, tape, tools, etc. put into a supply box that you will bring with you to the show. If you needed them for the dress rehearsal, you’ll probably need them for set up.
- Perfect opportunity to also take a couple of updated booth photos!
- Without the pressure of having to be ready for customers and you can also take your signs down for the photo.
- You’ll get a feel for just how much space you have, and how much you will need. You’ll probably tweak your pre-planned setup.
- You’ll get a real idea of how your displays really look and whether or not you may need to change something up.
This is probably the most reliable way to avoid most stresses, especially at the start of your season. You will be more efficient, and know more about what to expect.
This will help your helpers too! Even if you can’t have them do a dress rehearsal with you, you can take a picture of your setup and your helpers can use it as a reference so that everyone can work more efficiently with less questions for you!
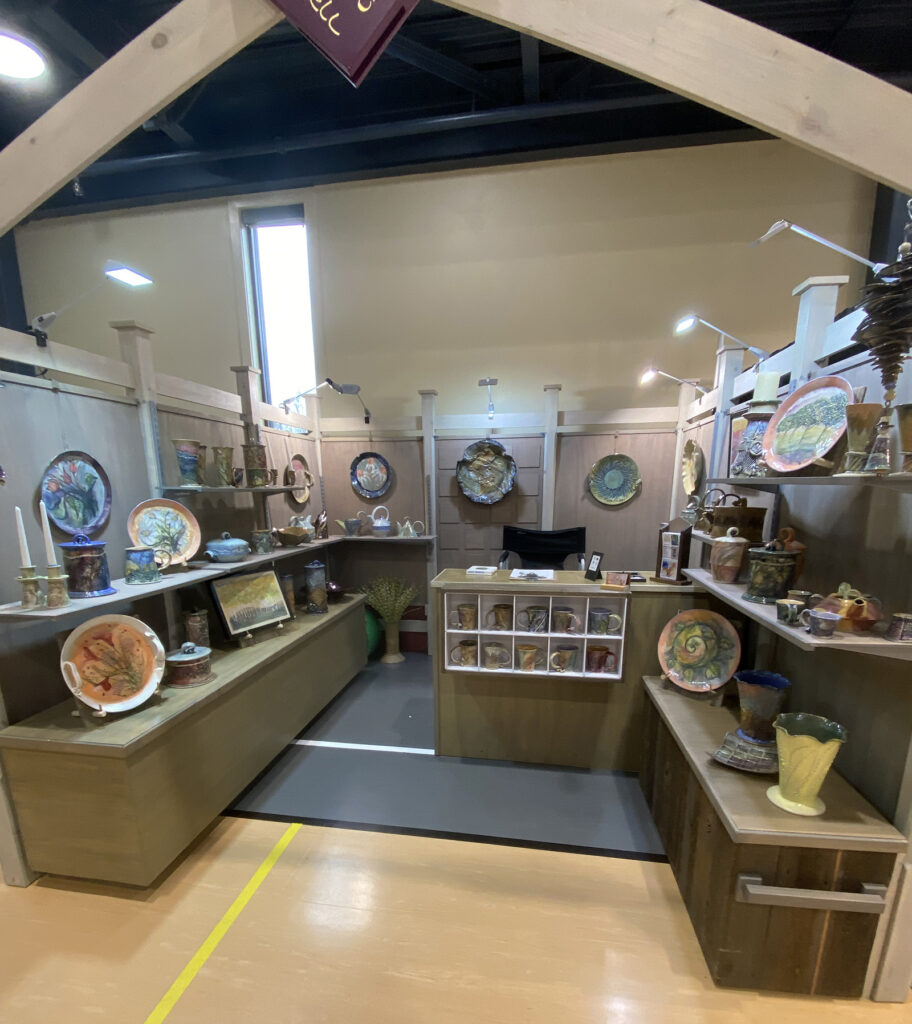
Walls – Why walls?
It’s understandable. Walls can be a real pain and if you haven’t done shows that require them, it’s just one more thing to figure out. BUT – walls are important at a Fine Craft show.
- It looks a lot more professional than an “open” show
- It allows customers to focus on you when they are in your booth and not get distracted by your neighbors.
Different types of Booth Walls
There are a couple of different approaches to booth walls. When you are considering them, think about what you make, are you planning on hanging anything from them? Is color important? Are you indoors, outdoors or both? What is your budget? What will fit into your vehicle?
Pro-Panels or other professional display walls:
- Ideal for 2D artists
- More expensive than other options, but also more durable and modular
- Can be purchased new, but used systems can be found at a much more reasonable cost
Pipe and Drape Systems
- Best for indoor shows
- Can be an affordable option – the cost to rent can actually be more than half the cost to buy
- Easy to set up, but is usually a 2-person job
Tent with Walls/Curtains
- Works well for indoor and outdoor shows
- For indoor shows, the top must be removed because it poses a fire hazard
- Not all indoor shows welcome tents as wall structures
- You will most likely need different sets of curtains/walls for different purposes:
- Vinyl for outdoor shows with inclement weather
- Netting for outdoor shows on hot days (you can use vinyl, but you will bake)
- Use cloth for indoor shows
Room Dividers and other Alternative Options
Good for indoor shows (tents are best for outside), you can get creative with your walls. Keep in mind:
- Not all indoor shows would find alternative solutions acceptable for booth walls. Some higher-end shows are very specific about what is and is not acceptable. Read all the show’s provided information and ask if you are not sure.
- Any “wall” should be a minimum of 5 1/2 feet high.
- Walls should be sturdy! You don’t want it falling down mid-show.
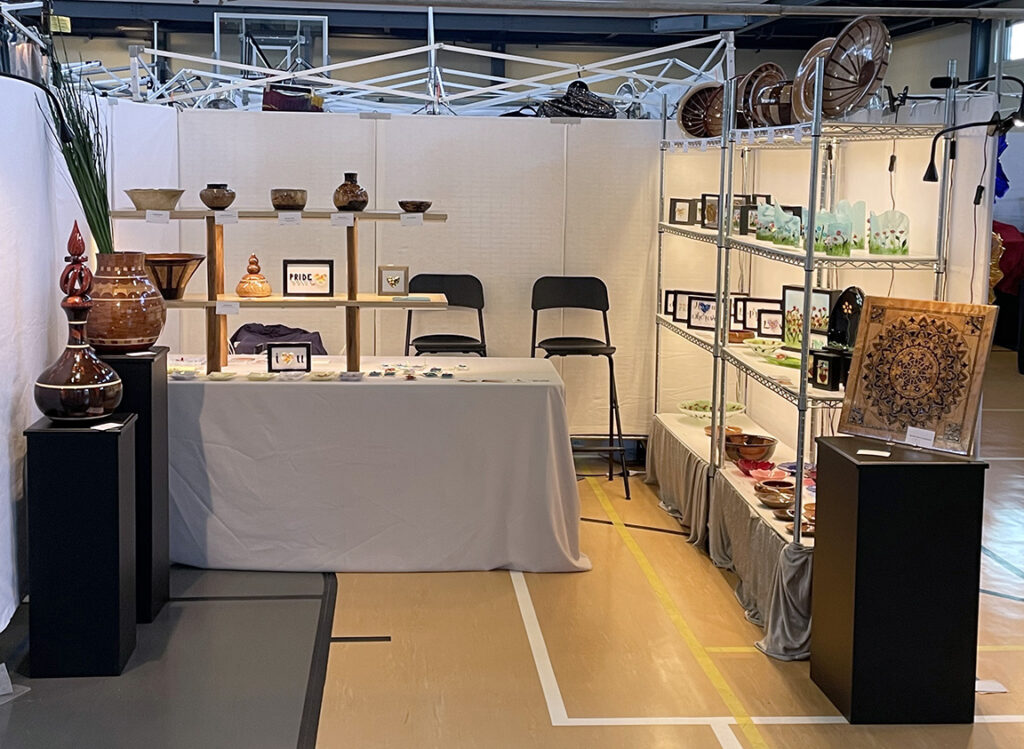
Furniture & Displays
Tables for any 3D art are the easiest and the “go-to” for most artists. But also don’t be afraid to consider floor shelves. Also keep these other points in mind:
- Think “up” – you only have 10 square feet horizontally, so don’t forget to also use the vertical space that is available to you.
- Stacking boxes
- Table-Top Shelves
- Hanging Displays
- Also think about what you can hang down from your pipe and drape/tent frame
Lights
Especially when it comes to indoor shows, you will want to consider lights. Even a well-lit room can seem dim, so light it up if you can! For outdoor shows, lights are not usually necessary – unless that show is in an especially shady area or goes into the night.
Keep in mind that with lights, you will usually need electricity (unless you are going all-in on battery operated). Some shows will offer electricity as part of the booth fee, and for others it will be an additional expense. Some shows won’t offer any electricity at all, so read the show’s prospectus carefully before applying!
Here are a few other important things to remember about lights:
- Aim for lights that are “daylight” colored. (5500 – 6500k) You don’t want your lights distorting the color of your work.
- When you leave your booth for the day, ALWAYS turn off your lights!
- Don’t forget that you will always be responsible for bringing your own cords! For length, 30-50ft is usually safe, and always make sure that it is newer and three-pronged.
- When in doubt, ask! The person in charge of running the show should be able to give you a good idea on what cord to bring.
Lighting Options
For Haverford Guild shows, all lights must be low power-draw LEDs. No exceptions!
Again, read the prospectus! If there is a restriction on lights, what kind of lights you may bring, it should all be there. If it’s not, ask! But here are some safe options to consider:
- Battery-operated
- Some battery-operated lights will last all day and are good options for shows where you don’t want to pay for the extra electricity, or if electricity is not available.
- USB powered
- These are typically much lower power-draw than standard lights and some are also battery operated. A good option for when electricity is available and when it is not.
- Plug-ins with LED lightbulbs
- WARNING: Avoid lights that get super hot! These are a fire hazard and draw massive amounts of electricity.
- These lights include old-school halogen lights and work lights. Avoid these at all costs!
Yes, strong lights are good, but be sensible, especially with safety in mind. If your booth is not a construction site, don’t use construction lights. Don’t blind your neighbors! The super bright, super hot lights are a safety hazard and avoid them at all costs. And even if you don’t you may be asked to remove them, especially if the venue is experiencing electricity problems!
You – In Your Booth!
Believe it or not, you need to account for yourself in your booth design! Yes, you need to fit into your display. Many shows will not allow you to (or have the space for you) to sit outside of your booth setup. Remember – it’s a functional space. So think about what you will need to do in it. Is there space for you to run your sales? Package the items that sold? You be comfortable in that space for an extended period of time?
Do not count on extra space to hang out in. Or rely on the idea that the show director will be totally cool with you expanding out a little bit. It may seem harmless enough to put your chair just outside your booth somewhere between you and your neighbor’s, but it may cause problems for your neighbor, the show director and everyone else!
Your Extra Stuff
Anyone who has ever done any sort of show knows that there is a ton of extra stuff. The boxes and bags you used to package up your booth, your cart, chairs, coolers, lunch (sometimes breakfast), coffee, tissues, electronics … all of it! You have to somehow figure out what to do with all of it, and in a way that the customers can’t readily see. So when you are planning out your booth don’t forget:
Where will you put your packing materials? All the stuff you used to get there. Not every show is able to provide an extra storage area, and schlepping to the car and back again may not always be practical. Have a workable plan for all that stuff.
Where can you put your extra inventory? As tempting as it is to put everything out at once, it’s not practical. So where will you put extra inventory so that you can fill in the holes as you sell?
Where will you store your snacks? Personally, I never count on finding edible food at any show I do. So I bring my own, which also means that I have to have a place for that.
So what can you do about this? Great “hiding” spaces are:
- Under tables. This is where those tablecloths that reach the floor are awesome! Under tables is a great storage area to utilize. But be warned, if you are doing an outdoor show, make sure the boxes and bins you store on any ground surface is water proof.
- Make a closet. This is good if you don’t have tables or if your tables and counters are tiny. If you can wall off a corner with a divider or curtain, then that can serve as a “closet” to keep your extra stuff.
- Think collapseable! This will depend on what you make, but if you can get bags and boxes that collapse or stack, then you will save tons of space and it will be a whole lot easier to hide your packing materials.
- For stuff you need quick access to – get a counter with shelves. Having a working counter in your space looks very professional and counters hide an impressive amount of stuff you will want to have close at hand.
- Schlepping. As a last resort, you can always plan on just making extra trips to the car and back. But keep in mind that many shows will not let you go to your car or bring your car closer until you are fully packed up. Here are two good ways of dealing with this issue:
- Have a helper show up at the end of the show, and make sure that they have your car keys. When the show closes, they can cart in your packing materials from where your car is parked so you don’t leave the show floor or break the rules.
- Make arrangements with the show director ahead of time. Most show directors are pretty reasonable people. So if you contact them well ahead of time to make arrangements that works for everyone (and keeps everyone safe!) they will at least appreciate the effort that you are making and usually will help you come up with a solution.
The Process Never Ends
If you’re wondering when you will land on the perfect booth display and you won’t have to worry about it any more… keep wondering. As your art evolves, so will your display.
But … it gets easier as you figure out what works and what doesn’t… The important thing is that you think ahead and keep experimenting!